- Βίντεο
- Blu-ray / DVD
- Χρησιμότητα
-
Δωρεάν Εργαλεία
- δωρεάν online
- Free Online Remover Watermark
- κατάστημα
- Πόρος
ΟΔΗΓΟΣ ΧΡΗΣΤΗ
Το Tipard Total Media Converter μπορεί να σας βοηθήσει να μετατρέψετε DVD και διάφορα βίντεο σε άλλες μορφές. Υποστηρίζει επίσης βίντεο 2D και 3D για να λαμβάνετε υπέροχα βίντεο 3D εφέ με μερικά κλικ. Επιπλέον, μπορείτε να προσαρμόσετε τις ρυθμίσεις προφίλ ανάλογα με τις ανάγκες σας. Ακολουθεί ένας οδηγός βήμα προς βήμα για να σας πει πώς να χρησιμοποιήσετε αυτόν τον μετατροπέα.
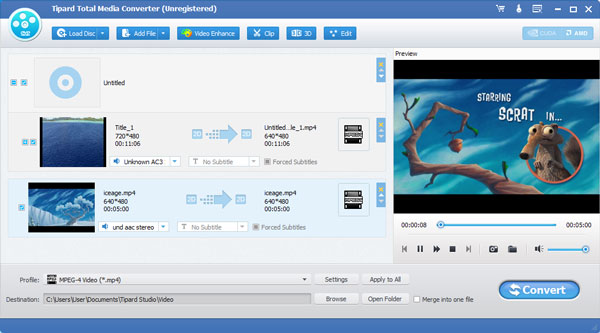
Βήμα 1 Προσθήκη αρχείων
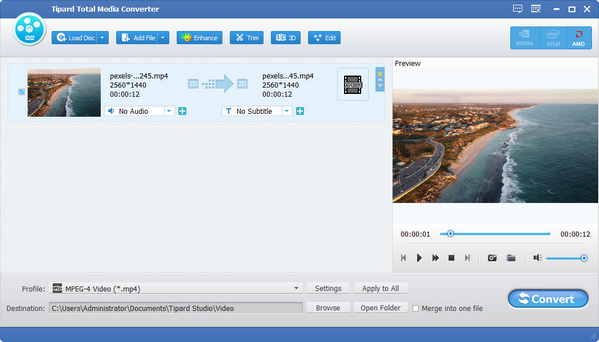
Μπορείτε να κάνετε κλικ στο Φόρτωση δίσκου κουμπί για να προσθέσετε δίσκο DVD, φάκελο DVD και αρχεία IFO ή να προσθέσετε γενικά αρχεία βίντεο κάνοντας κλικ Προσθήκη αρχείων.
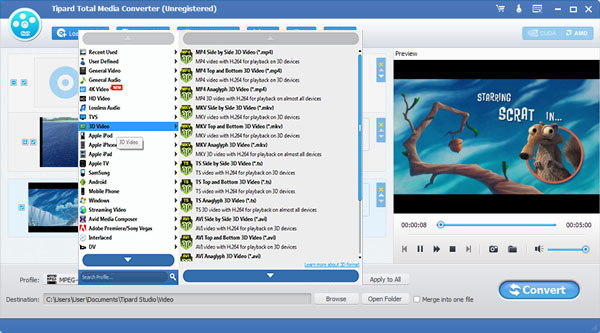
Βήμα 2 Επιλέξτε μορφότυπο εξόδου
Πατήστε Προφίλ ⬇️ αναπτυσσόμενο βέλος για να ανοίξετε το Προφίλ ⬇️ παράθυρο. Επιλέξτε 3D ως μορφή εξόδου. Ή μπορείτε να επιλέξετε διαφορετικές μορφές εξόδου για κάθε αρχείο προέλευσης βίντεο. Ή εισάγετε το όνομα της μορφής στο πλαίσιο γρήγορης αναζήτησης και επιλέξτε μία από τις αντίστοιχες μορφές ως μορφή εξόδου.
Βήμα 3 Ξεκινήστε τη μετατροπή βίντεο
Κάντε κλικ στο Μετατρέπω κουμπί για να ξεκινήσετε τη μετατροπή βίντεο στις απαραίτητες μορφές. Η γραμμή προόδου θα εμφανίζει τη λεπτομερή πρόοδο της μετατροπής. Μπορείτε να κάνετε κλικ στο Παύση or στάση κουμπί για τον έλεγχο της διαδικασίας μετατροπής κατά τη διάρκεια αυτής της διαδικασίας. Επιπλέον, αυτός ο φιλικός προς το χρήστη μετατροπέας βίντεο υποστηρίζει τη μαζική μετατροπή, η οποία εξοικονομεί πολύ χρόνο.
Προσαρμόστε τα βίντεό σας με πολλαπλές λειτουργίες επεξεργασίας, ανοίξτε το παράθυρο επεξεργασίας και αρχίστε να εξατομικεύετε τα βίντεο.
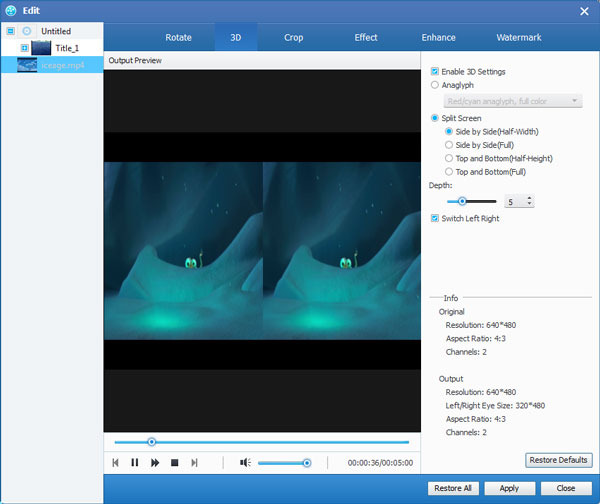
Βήμα 1 Ορίστε τις ρυθμίσεις 3D
Κάντε κλικ στο 3D εικονίδιο στη γραμμή εργαλείων για να ανοίξετε το παράθυρο επεξεργασίας και εδώ θα ελέγξετε Ενεργοποίηση ρυθμίσεων 3D επιλογή για να επιλέξετε την απαιτούμενη λειτουργία 3D για τα τρισδιάστατα βίντεο εξόδου σας, όπως η λειτουργία Anaglyph 3D ή η λειτουργία Split Screen 3D.
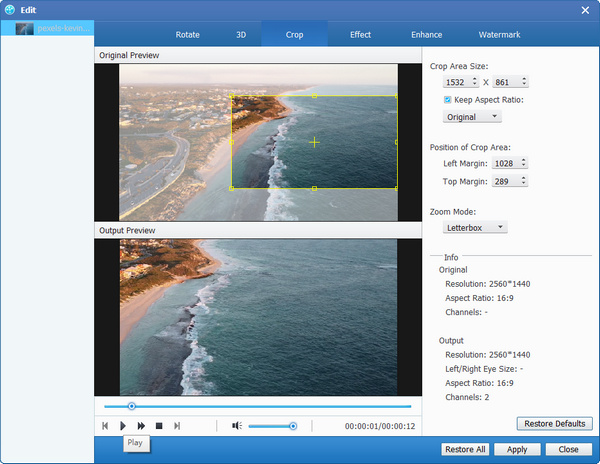
Βήμα 2 Περικοπή αρχείου βίντεο
Έλεγξε το Κρατήσει aspect ratio επιλογή προσαρμογής του καρέ βίντεο, όπως Πρωτότυπο, Περικοπή περιοχής, 16:9, 4:3. Αλλάξτε τη λειτουργία ζουμ ανάλογα με τις ανάγκες σας, όπως Letterboxing, Pillarboxing και Windowboxing.
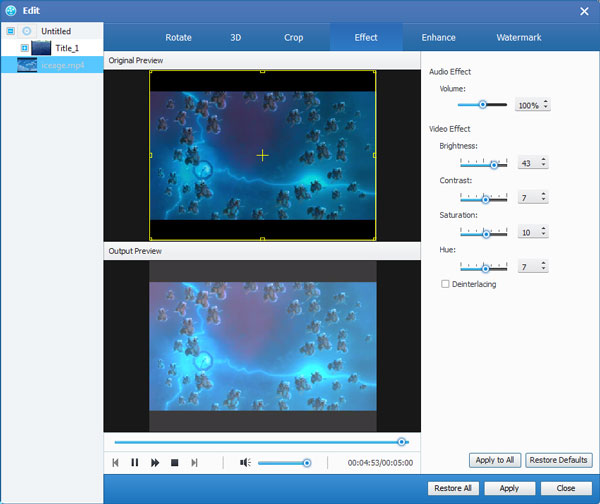
Βήμα 3 Ρυθμίστε το εφέ βίντεο
Κάντε κλικ στο Αποτέλεσμα στήλη και έχετε τη δυνατότητα να προσαρμόσετε τη Φωτεινότητα, τον Κορεσμό, την Αντίθεση, την Απόχρωση και την Ένταση για καλύτερο εφέ βίντεο.
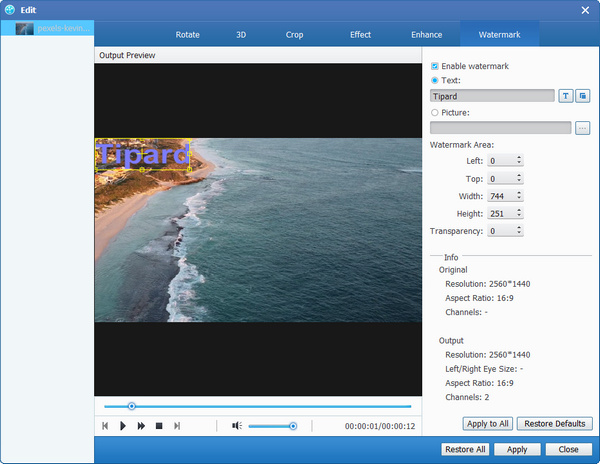
Βήμα 4 Προσθέστε υδατογράφημα σε βίντεο
Τα υδατογραφήματα εικόνας και κειμένου είναι ενεργοποιημένα εδώ. Μπορείτε να προσαρμόσετε τη διαφάνεια, τη θέση και το μέγεθος του υδατογραφήματος. Το στυλ γραμματοσειράς, το μέγεθος και το χρώμα είναι ρυθμιζόμενα για το υδατογράφημα του κειμένου.
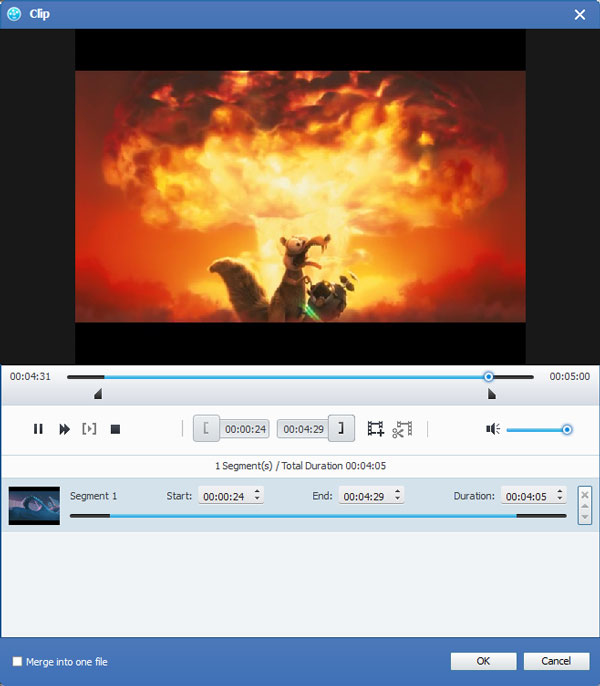
Βήμα 5 Κλιπ βίντεο και συγχώνευση κλιπ
Κάντε κλικ στο Περικοπή κουμπί στη γραμμή εργαλείων στο κύριο παράθυρο για να ανοίξει και, στη συνέχεια, μπορείτε να περικόψετε τη διάρκεια του βίντεο και να κόψετε το βίντεο σε πολλά τμήματα. Ή μπορείτε να κάνετε κλικ στο πηγαίνω κουμπί για να συγχωνεύσετε τα επιλεγμένα βίντεο κλιπ σε ένα νέο μεμονωμένο αρχείο.
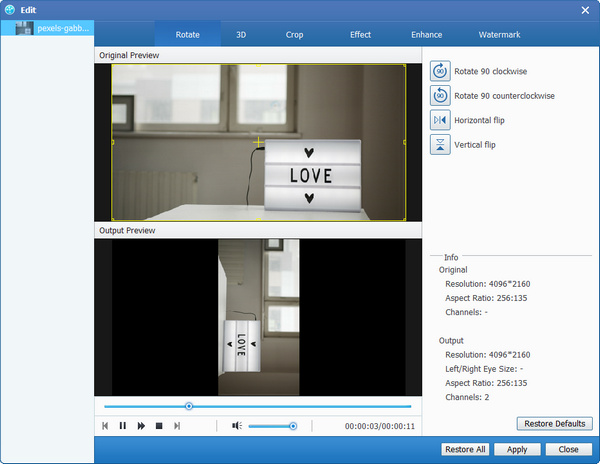
Βήμα 6 Περιστροφή βίντεο
Κάντε κλικ στο Αλλαγή κουμπί στη γραμμή εργαλείων στο κύριο παράθυρο για να ανοίξετε το Περιστροφή παράθυρο και, στη συνέχεια, μπορείτε να περιστρέψετε 90 δεξιόστροφα, 90 αριστερόστροφα, Οριζόντια αναστροφή και Κάθετη αναστροφή όπως θέλετε.
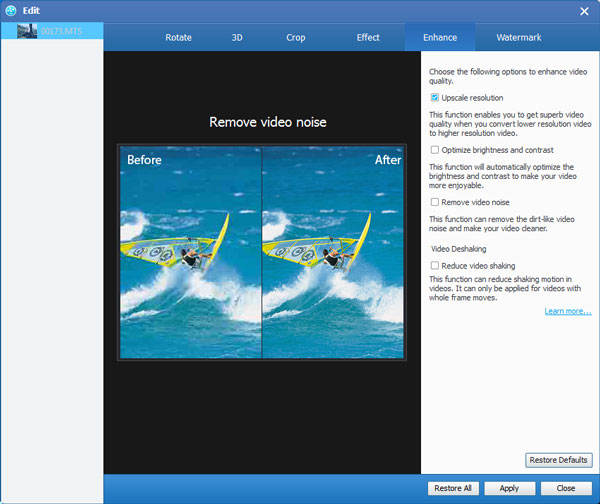
Βήμα 7 Βελτιώστε την ποιότητα του βίντεο
Πατήστε Επαυξάνω κουμπί στη γραμμή εργαλείων στο κύριο παράθυρο για να ανοίξετε το παράθυρο. Στη συνέχεια, μπορείτε να επιλέξετε Αναβάθμιση ανάλυσης, Βελτιστοποίηση φωτεινότητας και αντίθεσης, Κατάργηση θορύβου βίντεο και Μειώστε το κούνημα του βίντεο.
Βήμα 1 Ρυθμίστε τις ρυθμίσεις βίντεο
Όσον αφορά τις ρυθμίσεις βίντεο, προσαρμόστε τον κωδικοποιητή, το ρυθμό καρέ, την ανάλυση, την αναλογία διαστάσεων και το ρυθμό μετάδοσης bit βίντεο που έχετε στη διάθεσή σας.
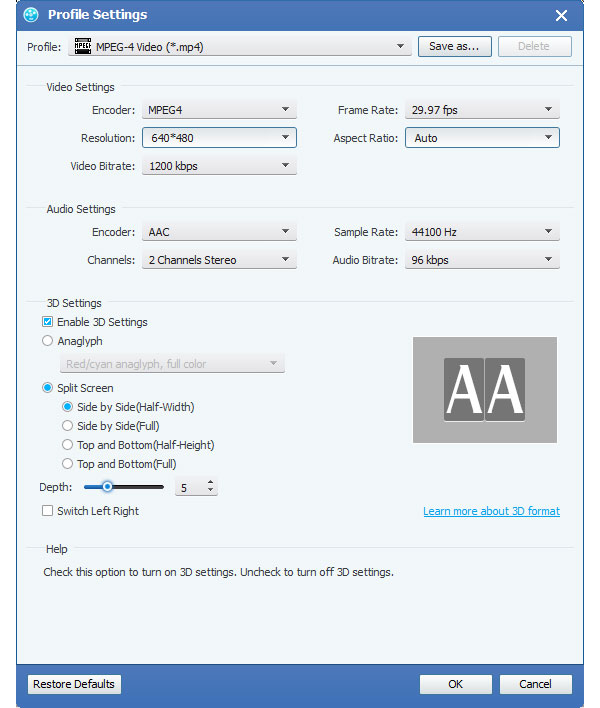
Βήμα 2 Τροποποιήστε τις ρυθμίσεις ήχου
Προσαρμόστε τις ρυθμίσεις ήχου όπως κωδικοποιητής, ρυθμός δειγματοληψίας, κανάλια και ρυθμός μετάδοσης bit ήχου για να ικανοποιήσετε τις ανάγκες σας.
Βήμα 3 Κάντε στιγμιότυπο και προεπισκόπηση
Στο Προβολή παράθυρο, θα παρακολουθούσατε το βίντεο πηγής πριν από τη μετατροπή. Μετά την επεξεργασία βίντεο, μπορείτε να κάνετε προεπισκόπηση του εφέ βίντεο εξόδου με την ενσωματωμένη συσκευή αναπαραγωγής. Μπορείτε να κάνετε κλικ στο Στιγμιότυπο εικονίδιο για να τραβήξετε την αγαπημένη εικόνα βίντεο κατά την προεπισκόπηση.

Αρχική | About | Privacy Policy | Όροί χρήσης | Υιοθετώ | Υποστήριξη | Επικοινωνία
Πνευματικά δικαιώματα © Studio 2024 Tipard. Ολα τα δικαιώματα διατηρούνται.